Setting up a Subversion server in Windows using VisualSVN
Subversion is one of the widely used version controlling system amongst java developer community. Because of the flexibility and features that the Subversion provides, most of the developers have migrated to Subversion from CVS, which is another version controlling tool. If you want to setup a source controlling for your Java projects, you could install the Subversion core server and can create/manage data repositories directly from the command line. But if you want a Subversion product that just works out of the box, you need to have a look at the VisualSVN server.
VisualSVN Server – Subversion Server for Windows
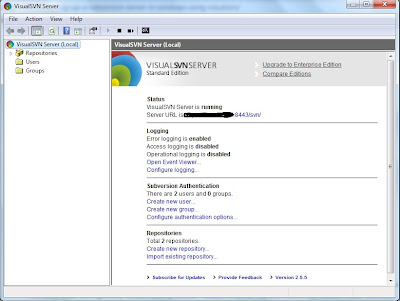
VisualSVN is a free software that helps us to install and manage a Subversion server in Windows operating system. VisualSVN server comes with the core Subversion system, an Apache Server for running the Subversion server as Windows service and a visual management console. It also provides the access control for the subversion repositories, by creating users and groups.
Steps to setup a Subversion repository using VisualSVN server
- Download VisualSVN server and install it on your windows machine. When you install VisualSvn server, it also install the Windows service.
- Start the VisualSVN server Manager, which will open the repository browser.
- To create a new repository for your project, right click on the Repositories and select ‘Create New Repository‘. This will ask you for the repository name. And, by default VisualSvn server will also creates the default folder structure (trunk,tag,branch) for your project.
- Once the repository is created, next step would be creating users and groups. To do this, right click on ‘Users’ and select ‘Create User’. Enter the user and and give password. Similar to this, you can create a group also and associate your user to the group.
- To give access to the repository for the newly created user, right click on the repository, select ‘Security’ and then from the ‘Properties’ window, click ‘Add’ to add users to our repository. Either a group or a user can be selected and added to the repository.
- After adding the user/group to the repository, the ‘access levels’ can be controlled from the ‘Properties’ window, as shown below.
- We are almost done. Now right click on your repository and select ‘Copy URL to Clipboard’ and share it with your fellow developers. This is your Subversion URL which can be accessed by other developers for checking out/checking in their code.


No comments