In this article, we will explore, How to implement keycloak authentication for ASP.net Application
Step 1:
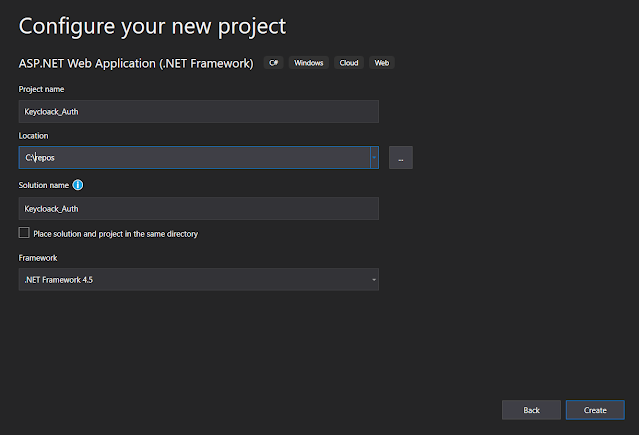
Create a new
project/solution of the ASP.NET Web Application project type. When the ASP.NET
wizard comes up, select the MVC website template for ASP.NET 4.5, and change
the authentication type to No Authentication.


Step 2:
Now right click on the project and choose Manage NuGet
Package Manager.
Now update all required packages, and then browse for the following packages:
- Owin.Security.Keycloak
- Microsoft.Owin.Host.SystemWeb
- Microsoft.Owin.Security.Cookies
Step 3:
Now, Right-click on the project and select Add new item and create a new class called Startup.cs as shown below.
copy and paste the below code in the newly created class.
using Microsoft.Owin;
using Microsoft.Owin.Security;
using Microsoft.Owin.Security.Cookies;
using Owin;
using Owin.Security.Keycloak;
using System;
namespace Keycloack_Auth
{
public class Startup
{
public void ConfigureAuth(IAppBuilder app)
{
const string persistentAuthType = "keycloak_auth";
app.SetDefaultSignInAsAuthenticationType(persistentAuthType);
app.UseCookieAuthentication(new CookieAuthenticationOptions
{
AuthenticationType = persistentAuthType
});
var desc = new AuthenticationDescription();
desc.AuthenticationType = "keycloak_auth";
desc.Caption = "keycloak_auth";
app.UseKeycloakAuthentication(
new KeycloakAuthenticationOptions()
{
Description = desc,
Realm = "master",
ClientId = "keycloakdemo",
ClientSecret = "181cc7df-85f1-427b-81c6-247f20a5fd02",
KeycloakUrl = "https://localhost:5000/auth",
DisableAudienceValidation = true,
AuthenticationType = "keycloak_auth",
AllowUnsignedTokens = false,
DisableIssuerValidation = false,
TokenClockSkew = TimeSpan.FromSeconds(2)
});
}
}
}
Step 4:
Open Keycloak URL and login as admin user.
Create a new client for your ASP.net demo application

Now Select the credentials tab and copy the secret ID to add to the ASP.net Application.
Step 5:
Open the HomeController.cs and add the Authorize attribute for authentication.
Step 6:
Build and Run the application !!
The application will redirect automatically to Keycloak login page for authentication.
Once authenticated application will show the home page.
Hope this article helps !!
Thanks for reading this article ! ! please leave your comments and suggestion about this article.


